On this page
This is a guide for how to deploy UNE on a single Windows server, either a physical machine or virtual machine (VM). Note that the server does not have to be the same as the one hosting ArcGIS Enterprise.
If you are upgrading an existing UNE for ArcGIS Single Server installation, please refer to the Updating an existing installation section at the end of this guide.
Step 1 – Install the prerequisites
UNE for ArcGIS requires a webserver to serve its static pages and content. To enable multi-user locking, it also requires a number of server side components in order to interact correctly with multiple clients.
The following are the pre-requisites which must be installed on the machine.
Node.js
The server side components of UNE for ArcGIS are built using Node.js.
We recommend installing the latest stable release of Node.js which can be downloaded from this page.
Web Server
For the purposes of this guide, Microsoft Windows IIS has been used.
- Ensure IIS has bindings configured for https.
- Ensure Windows Features ASP.NET and .NET are installed, enabled and up to date (.NET 8 + recommended).
- Install URL Rewrite Module 2.1. This is an extension that allows IIS to rewrite URLs.
It is available as a windows installer file from https://www.iis.net/downloads/microsoft/url-rewrite. - (Optional) Install IISNode x64. This is an extension that allows IIS to connect to Node.js and simplifies the setup of the UNE locking service. It is available from https://github.com/Azure/iisnode.
Step 2 – Set up the web server (UNE application)
UNE for ArcGIS is provided as a directory of files that must be deployed onto the web server, using the steps below.
- Obtain the latest release media from the Esri UK Application Licensing Hub.
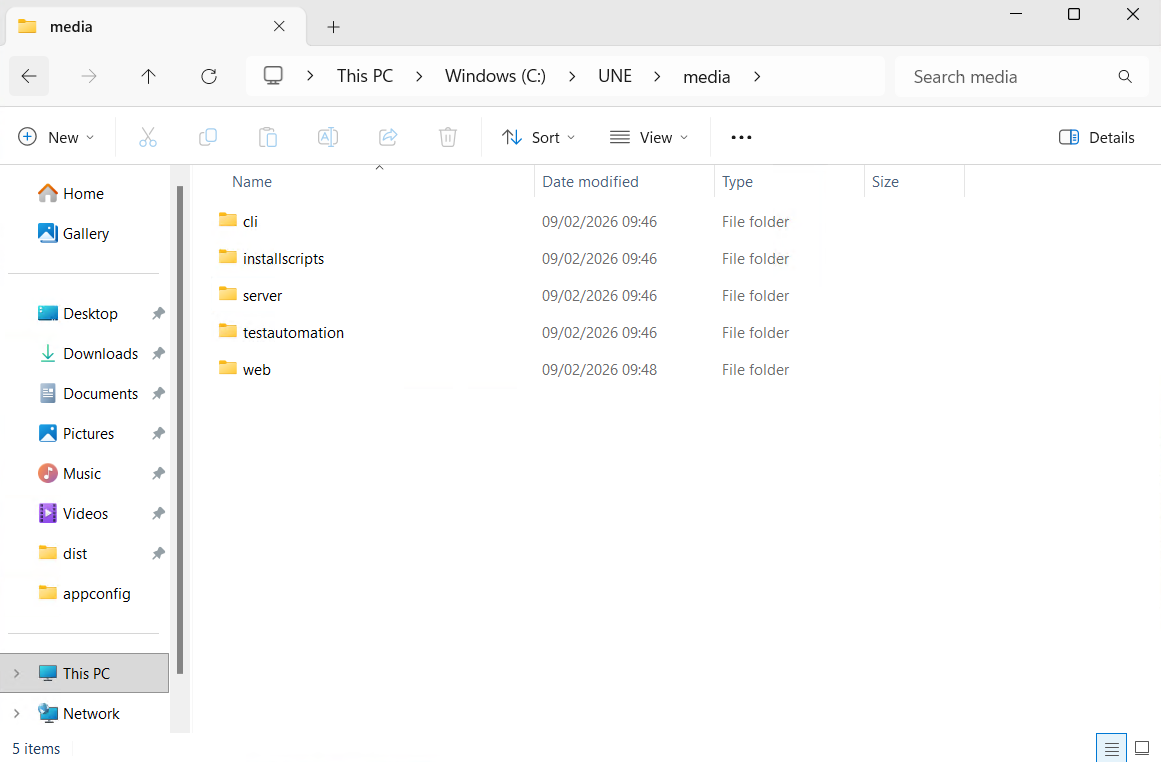
- Copy the contents of the zipped media onto the web server. It will consist of the following folders:
- cli
- installscripts
- server
- testautomation
- web
- In IIS right-click on the Default Web Site and add an application. Give the application an alias of UNE. Copy the path to the web folder in Windows Explorer and paste it into the IIS application
- In IIS right-click on the Default Web Site and add an application. Give the application an alias of UNEServer. Copy the path to the server folder in Windows Explorer and paste it into the IIS application Physical Path setting.

$ cd c:\UNE\media\server
$ npm install
- Next the software dependencies need to be installed. Open a command prompt and change the directory to the server folder and use the command
npm installto install the components: - Once the server components are installed, please edit the Server configuration files to provide a set of allowed URLs.
- Navigate to the
server\dist\config.jsonfile and open it in an editor. - Find the
originsproperty. The syntax is"origins": [ "https://<WEBSERVERURL>.com" ]. Wildcards and multiple entries are allowed in this property. - Keep the existing URLs (starting with
"REGEX:...") in the origins property and add a comma after the last one. - Add the public facing URL of the web server behind the newly added comma (onto a new line) to the origins property. Ensure it is enclosed in double quotes.
- If upgrading from an earlier version, please ensure there is a
virtualFolderproperty, and it is set to your hosting server’s virtual folder. e.g."/uneserver":"origins": [ "https://<WEBSERVERURL>.com" ] "virtualFolder": "/uneserver" - Ensure the Server is working, by going to the following URLs:
- https:[serverdetails]/name of virtual directory/serverinfo
e.g. https://localhost/uneserver/serverinfo
This should display a message from the server similar to the below. - https:[serverdetails]/name of virtual directory/serverping
e.g. https://localhost/uneserver/serverping
This should show a successful ping message.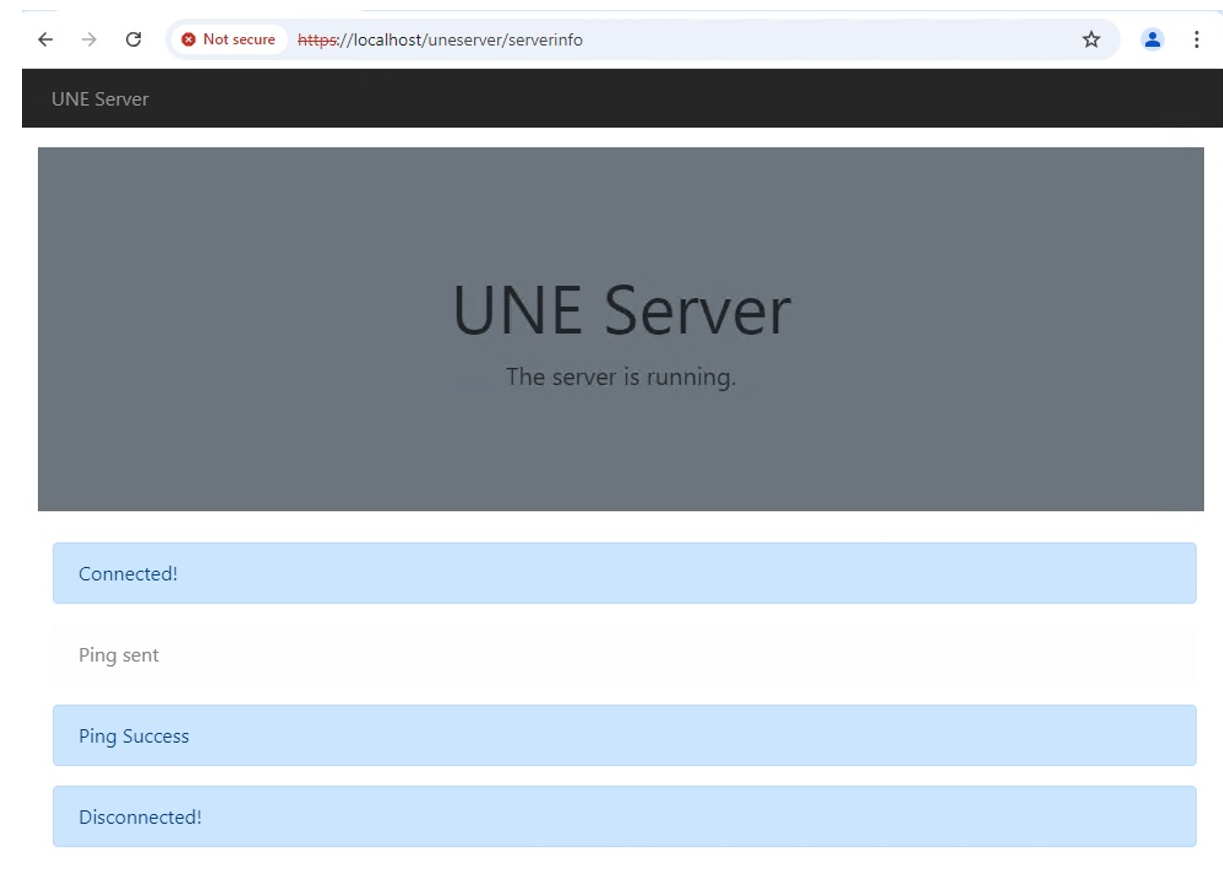
- https:[serverdetails]/name of virtual directory/serverinfo
- Navigate to the
Step 3 – Registering UNE with ArcGIS Enterprise
UNE needs to be registered with ArcGIS Enterprise. To do this you will need to add an Item to your portal, and ensure it is a registered item.
- Launch ArcGIS Enterprise in a browser and log in as an administrative portal user.
- Navigate to your Content and click New item.
- For the item type, choose an Application, .
- Choose Web Mapping.
- Enter the URL to the client application folder that was added as the path in IIS. You can check the UNE application in IIS to view the details of this path. e.g. https://localhost/une/
- Add an appropriate Title for the application (e.g. UNE for ArcGIS) and select the Folder it should be saved into.
- After clicking Next, the details page of the new item will appear.
- Share the UNE for ArcGIS item with your Organization.
- Click Settings and scroll down to App Registration. Click the Register button.
- For App Type, choose Multiple.
- For Redirect URI, add the http & https version of the URL. In addition add une://launch.html .
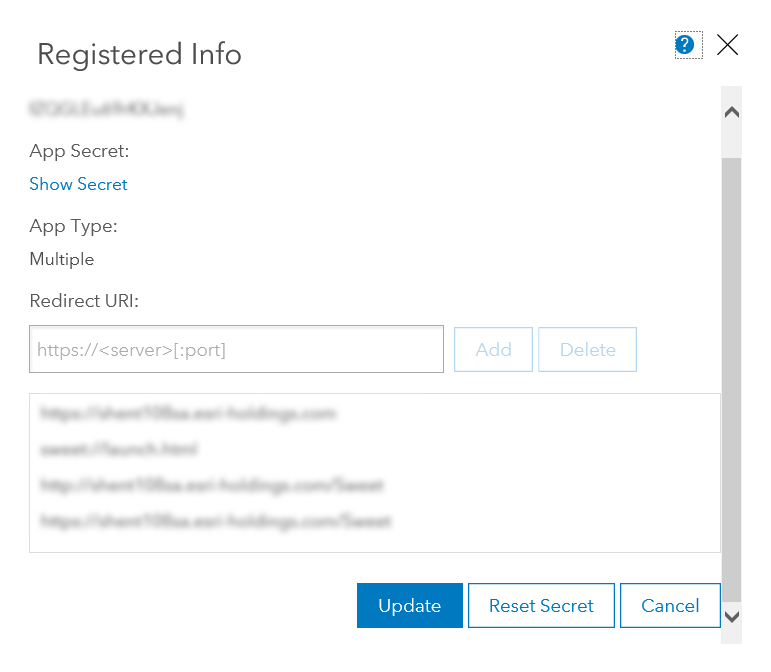
- After completing the registration, make a note of the Item ID which can be taken from the URL of the item, and the App ID which can be found in the registration window. You will need these when configuring UNE for ArcGIS.
Step 4 – Configuring UNE
Now the item is in the portal, it is necessary to change the UNE configuration files, to point to all the above paths, and identifiers.
- Browse to
C:\UNE\media\web\appconfigand open the file calledappconfig.jsin a text editor. - In the
socketUrlsection, change theurlparameter to the URL of your web server. Use only the domain name i.e.https://mysweetserver.mycompany.com/– do not include any path/virtual directory. - In the
socketUrlsection, change thepathparameter to the path provided for the web server components in IIS. (e.g.uneserver/socket.io). - Change the
rootStempath parameter to the UNE ‘clientapplication’ URL from IIS, e.g./uneserver. - Change the
proxyUrlparameter to the path provided for the web server component, proxy. - Change the
provisioningRegisteredClientIdparameter to the app-id shown in the Register part of the item details. (e.g.a8B0C5dEFgHijk2l). - Change the
provisioningAppIdparameter to the id of the item supplied in the browser url. (e.g.12A34567bc8d4e5fg31h696i45235jkl). - Change the
sharingUrl, to be the sharing URL for your portal e.g.https://arcgis-server.mycompany.com/portal/sharing - Change the
portalUrl, to be the URL of the portal e.g.https://arcgis-server.mycompany.com/portal
When deploying UNE with Integrated Windows Authentication (IWA), you may need to add a trustedServers property to your UNE configuration file (appconfig.js). The trustedServers property should be added in the following format: "trustedServers": ["<server-one-url>", "<server-two-url>", ...]. This ensures that the underlying ArcGIS JavaScript API includes the required authorization headers and cookies when sending requests to external services. Only servers referenced by the application (i.e., not the hosting server) need to be listed.
The application is now ready to be launched. Either by clicking the View button on the item’s details page in ArcGIS Enterprise or going to the builder URL.
Step 5 – Licensing UNE
Once the media has been installed and configured, the last step is to create and install your license file. See the steps here on how to do that.
Updating an existing installation
To update a previous installation of UNE, preserving the existing configuration – the following steps should be followed.
- Locate the existing UNE installation folder on the server.
This can be done by looking at the Web Application’s Virtual Path in IIS.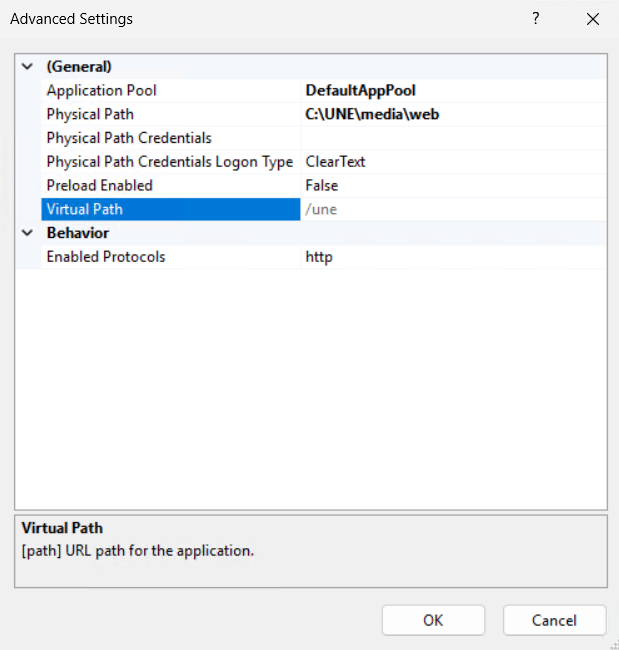
And in file explorer will look like this:
We will be replacing the five folders here. - From the above folders – take a backup copy of the appconfig folder (containing the appconfig.js and the license file) and config file
- …\web\appconfig
- …\server\dist\config.json
- Obtain the latest release media from the Esri UK Application Licensing Hub .
- Remove the existing folders above and replace with the contents of the zipped media. It should look the same as the second screenshot under point 1.
- Next the software dependency modules need to be installed. Open a command prompt and change the directory to the server folder and use the command npm install to install the components:
e.g.$ cd c:\UNE\media\server$ npm install - Now we need to replace the appconfig folder and files we backed up.
Replace the configuration file and appconfig folder with the backup ones taken from the previous installation. Furthermore, before replacing the files, check they have the correct Product ID, license file, and URL’s pointing to the correct Enterprise server:- …\web\appconfig
- …\server\dist\config.json
- Test the updated installation by going to the following URLs:
- https:[serverdetails]/name of virtual directory/serverinfo
e.g. https://localhost/uneserver/serverinfo
This should display a message from the server similar to the below. - https:[serverdetails]/name of virtual directory/serverping
e.g. https://localhost/serverping
This should show a successful ping message.
If you get an error here – make sure you have completed the npm install step and the IIS virtual path is pointing to the server folder.
- https:[serverdetails]/name of virtual directory/serverinfo
Additional steps
- If your organisation restricts access to resources using Cross Origin Resource Sharing (CORS) then there are additional steps to ensure UNE can connect to ArcGIS Enterprise
- If you are using UNE for Mobile then there are CORS settings that will need to be updated
- Ensure that Application Request Routing (ARR) is installed and enabled in IIS. ARR can be downloaded from https://www.microsoft.com/en-us/download/details.aspx?id=47333.
- Create a URLRewrite rule for /uneserver that forwards all requests to
http://localhost:8888/. This is often easiest to configure at the root of IIS – in which case the rule should use a pattern of^uneserver/(.*)with a rewrite (destination) URL ofhttp://localhost:8888/{R:1}. - Start the UNE locking service using the command
node app.jsinserver/dist. This must be running whenever the server is running. There are a number of options to do this, for example:- Use a startup script on the server to restart the locking service whenever the machine is restarted
- Install the locking service as a Windows service – for instructions on how to do this using node-windows see https://mailtogulershad.medium.com/set-up-a-node-js-backend-as-a-windows-service-a9b17bf7403f
- Once these steps are complete you can verify the service is running.
Enable the multi-user locking service
If using IISNode, no additional steps are required. To run the multi-user locking service without a third-party IIS extension follow the steps below. More details on most of the steps can be found at https://learn.microsoft.com/en-us/iis/extensions/url-rewrite-module/reverse-proxy-with-url-rewrite-v2-and-application-request-routing.